

MA System Settings 
Section titled “MA System Settings ”The core server settings are set with typical defaults that should work for most users. However, there are settings available for each of the core controllers and these are outlined below. All controllers have a setting for the log level in the advanced section. There may be slight differences in the settings between the Home Assistant App and docker versions of the servers.
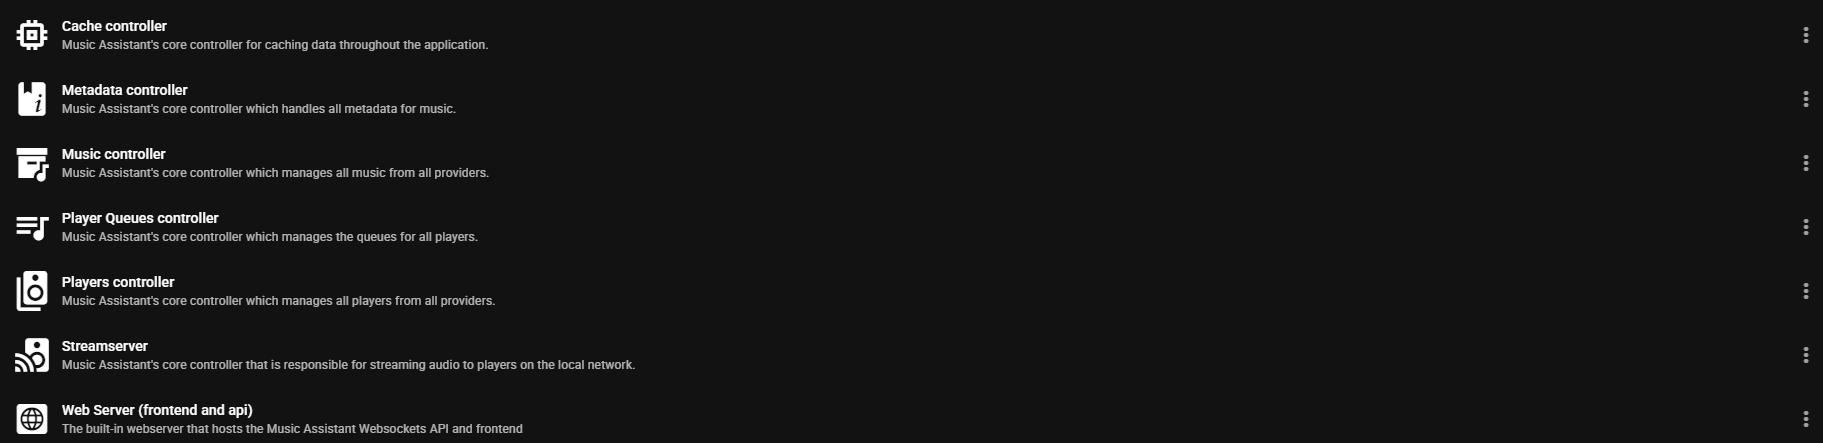
Background Tasks (configuration)
Section titled “Background Tasks (configuration)”- Maximum number of concurrent background tasks. Defaults to 2. This controls how many background tasks run simultaneously. Higher numbers mean higher demands on the system’s resources and can slow the system down. Setting is only visible when the advanced toggle is on
- A button is available to clear the cache used by Music Assistant. Do not routinely use this button as it increases API usage and slows down the MA experience
Discovery
Section titled “Discovery”- Allow network discovery for UPnP discovery. When enabled, MA uses an additional broadcast based discovery method (SSDP). Turn this on if some UPnP/DLNA players are not being found by regular discovery (see the discovery checklist)
- MDNS/Zeroconf discovery interface(s). Options are
Default interface [default]andAll interfaces. Used in custom network setups when multiple network interfaces are used. Setting is only visible when the advanced toggle is on
Metadata
Section titled “Metadata”- Preferred language. Preferred language for metadata. If the selected language is unavailable then English will be used
- Enable metadata retrieval from online metadata providers. Enables the lookup of information that is not available locally. MA does not modify any existing metadata but supplements it
- Use local genre metadata only when available. Online metadata providers will not add genres to items that already have a genre from a local source such as a file tag or NFO file. Items with no local genre still receive genres from online providers as usual
- Enable artist/track artwork lookup for radio streams. Enables the lookup of album or artist imagery when the station supplies
Artist - Trackmetadata - Maximum thumbnail cache size(MB). When the cache exceeds this value the oldest thumbnails are automatically removed
- Advanced - Reset Library Database. Selecting this button will erase the MA library database. This is a destructive irreversible action! This should only be used if database corruption is confirmed. All library items including playlists stored in the database will be lost and will need to be recreated. A rescan of the music sources will rebuild the database with the information contained on those providers. Do not use this routinely. For problems with individual items use the REMOVE FROM LIBRARY menu option
Players
Section titled “Players”- Volume step size. Defaults to zero which enables an adapative mode where the step size is smaller at the ends of the range. When set, this determines how much the volume change when an up or down command is received (e.g. mouse wheel click, slider tap, HA action)
- Announcement text to speech engine. Which engine is used to generate announcements sent from within Music Assistant. The engines on offer come from your plugins, such as the Home Assistant Plugin
Player Queues
Section titled “Player Queues”The behaviour when playing or enqueuing items is determined by the settings in this section.
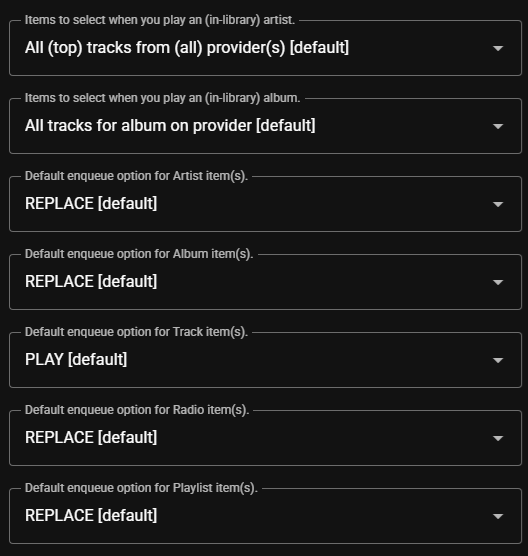
Additionally, there are options which can be set on a global level which can be overridden on a per queue basis.

Smart Shuffle enhances standard shuffle behavior by intelligently reducing repetition. Instead of selecting tracks purely at random, songs and artists that have been played recently are deprioritized, resulting in a more evenly distributed listening experience and reducing the likelihood of the same tracks being repeated when playlists are replayed. Smart Shuffle is always applied when playing a dynamic playlist, regardless of this setting.
Optimize order for Smart Fades is an optional Smart Shuffle setting. When Smart crossfade is active, Music Assistant uses existing Smart Fades analysis to arrange upcoming tracks so Smart Fades has a better chance of creating a smooth transition between consecutive tracks. It considers tempo, musical key and how the energy changes from the end of one track to the start of the next. Songs and artists played recently are still deprioritized according to the Smart Shuffle settings. No new analysis is started for this, and tracks without analysis are neither preferred nor penalized. Smart Fades still decides how the actual transition is mixed when the tracks play.
A setting is available to enable Autoplay by default on all queues. Then Autoplay itself has four options as follows:
-
Automatic — similar tracks, falling back to your library (default). New tracks similar to what was recently played are requested from the music providers. If no provider is able to supply similar-track recommendations (for example, when only local files are used), an endless mix drawn from the library is used instead, so playback will not stop
-
Similar to what you played. Tracks that resemble the most recently played items in the queue are fetched from the connected music providers and appended to the queue. This mode relies on a provider that offers similar-track recommendations; if none is available, no tracks are added
-
Infinite mix from your library. Tracks are selected from the local library, with preference given to those that have been played the least. The selection is biased towards the genres of the items that were played most recently; when too few matching tracks are found, the mix is topped up with random tracks from across the whole library.
-
Tracks from a playlist. The playlist the user has selected in the box below will be played
Crossfade can be enabled or disabled by default on all queues via a setting here and also can be turned on and off via the button at the top of the Now Playing view. Which crossfade mode will be enabled can be set here on a global level but can be overridden on a per player basis as well. Smart crossfade is the default. Smart Fades automatically analyzes each track’s tempo and beats to create seamless, musically aligned transitions between songs. It adjusts BPM, aligns downbeats, and applies EQ-based mixing for smoother fades—falling back to standard crossfade if analysis fails. Standard crossfade smoothly overlaps the end of one song with the start of the next using a simple volume fade. This is the only place that the standard crossfade duration can be set.
Volume Normalization is enabled by default and works to eliminate volume differences between media items and sources. The target level is set in the Streams Queue Playback Settings
Streams
Section titled “Streams”All settings in this section should be considered advanced and will not need to be adjusted in the majority of cases. Users with complicated network setups will find settings in this section that will be useful. If MA appears to be setup correctly but no playback occurs then check the settings in this section.
Queue Playback
Section titled “Queue Playback”Audio buffer size. Controls how much audio is buffered in memory. A larger buffer improves playback stability and seeking but uses more memory. The options are Maximum [default], Minimal and Balanced. The options are filtered depending upon system RAM. Minimal (60s buffer) is always available, Balanced (300s) requires a nominal 4 GB of RAM, and Maximum (1200s) requires a nominal 8 GB of RAM. If total memory can’t be determined then all three presets are offered although the default in that case is, conservatively, Minimal.
This section contains settings which affect the Volume Normalization functionality of MA. This functionality is enabled by default and settings are also available on an individual queue basis. There are two of these settings, one for tracks, one for radio, and you set them independently.
The best result comes from a loudness measurement of the audio. Tracks tagged with ReplayGain or R128 loudness values supply one directly, and Music Assistant uses those in preference to measuring anything itself. Everything else it measures on its own: your local library automatically in a nightly background scan, and anything played, including streaming services, while it plays, so those are covered from the second play onwards. The options differ mainly in what happens before a value exists:
- Fallback Dynamic (default) — use the measurement when there is one, otherwise adjust loudness on the fly. Always evens things out; the on-the-fly path is slightly less precise
- Fallback Fixed Gain — use the measurement when there is one, otherwise apply the fixed adjustment below
- Measurement Only — only adjust when a measurement exists. Anything not yet analysed plays at its original loudness
- Dynamic — always adjust on the fly, ignoring measurements
- Fixed Gain — never analyse; apply the same fixed adjustment to everything
- Disabled — leave loudness untouched
Once a measurement exists it is used, whichever of the two fallback options is selected. Two other things are worth knowing: live radio is rarely measured, so the radio setting in practice runs on whichever fallback you choose, and volume normalization also has to be switched on for the player itself. These settings control how it’s done, not whether. How the value is chosen, and when album gain is used instead of track gain, is covered on the Technical Information page.
Fixed/fallback gain adjustment — tracks / radio
How much to raise or lower the volume, in dB, whenever the fixed-gain path is used. That’s either the Fixed Gain method, or Fallback Fixed Gain when no measurement is available. Negative values make things quieter. The range is −20 to +10 dB and the default is −6. Other methods ignore it. Again, separate values exist for tracks and radio.

- Allow crossfade between tracks from the same album. Not enabled by default as it may not be desirable particularly for live albums
Streamserver Advanced Settings
Section titled “Streamserver Advanced Settings”Generic
Section titled “Generic”- The Published IP address and TCP Port are normally populated automatically and set to
auto. This is the address Music Assistant advertises to stream clients (including Sendspin) as the place to connect to for audio. It must be a literal IP address reachable by players on your local network, not a hostname, domain name, or URL. If there are issues with playback, confirm the IP address shown is reachable by the players on the local network. The port must be available. - Bind to IP/interface. Use in complex network setups to start the streamserver on a specific interface
Audio Analysis Options
Section titled “Audio Analysis Options”- SmartFades Log Level. Specific log level for the Smart Fades mixer and analyzer
- Background analysis concurrency. Maximum number of tracks analysed concurrently during the nightly background scan. Default is 1 and should only be increased on more powerful systems
Webserver
Section titled “Webserver”- Server Name. The name of this Music Assistant instance, shown in the UI and announced on the network. Useful when you run more than one server. Clear the field to restore the default name
- Allow User Self-Registration. Allows users to create accounts by logging in with Home Assistant. Only appears when the Home Assistant plugin is added in Music Assistant, since the login goes through your HA instance
The settings below are advanced and only appear when advanced settings are enabled in the UI
- Internal URL. The address devices and apps on your local network use to reach the web UI and API. Leave this on
autounless you have a reason not to. Music Assistant works the address out itself from the server’s IP address and the TCP port below. Set it manually only when clients need to reach Music Assistant at a different address than the server sees, behind a reverse proxy, for example. In that case enter the full address including the port, such ashttps://music.example.com:443. The TCP Port field is separate and still applies, as it’s the port Music Assistant itself listens on, which behind a proxy is usually not the port in your Internal URL - External URL. The address Music Assistant can be reached at from outside your local network, for example through a reverse proxy. Leave empty if your server isn’t reachable from the internet
- TCP Port. The port the webserver runs on (default
8095). If you change it, and you set the Internal URL manually, change the port there as well - Enable SSL/TLS. Serves the web UI and API over HTTPS. When enabled, two additional fields are revealed for the
SSL CertificateandSSL Private Key. Both must be PEM format, and you can either paste the file contents or enter an absolute path (e.g./ssl/fullchain.pem). RSA and ECDSA are both supported and the private key must be unencrypted. Use theVerifybutton to check the certificate and key are valid and match. If the certificate can’t be loaded, the webserver keeps running unencrypted and shows a warning - Advanced-Bind to IP/Interface. Start the webserver on this specific interface. The default
0.0.0.0binds to all interfaces (IPv4 and IPv6). Change this only in setups such as binding to a docker-internal network behind a reverse proxy
Diagnostics
Section titled “Diagnostics”This opens a view where the 150 line tail of the Music Assistant log can be seen and the diagnostics report or full log can be downloaded.
Background Tasks
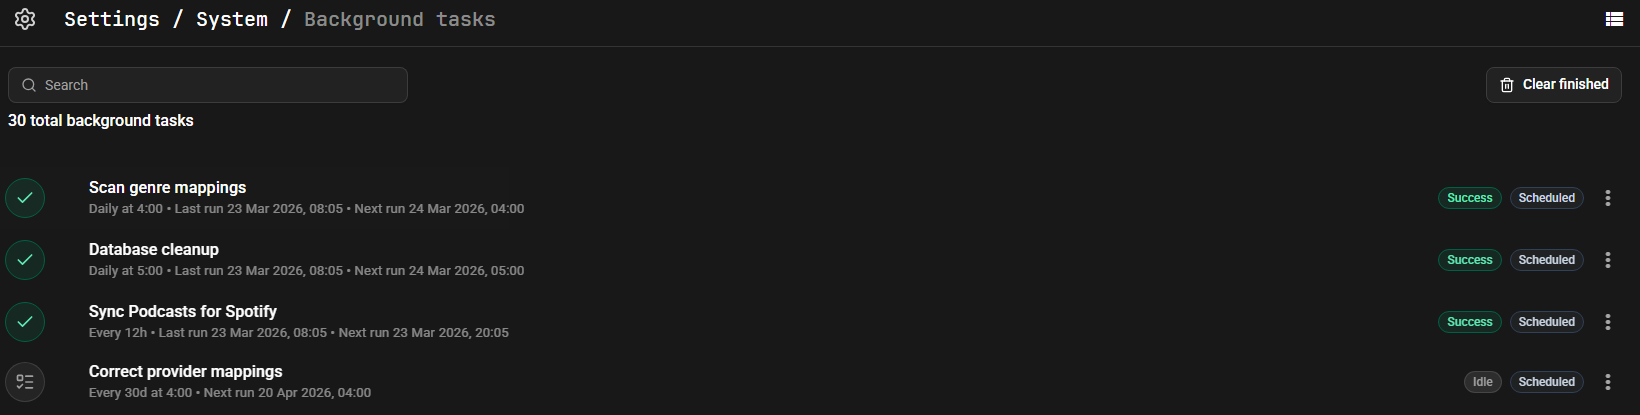
Section titled “Background Tasks”This opens a view where the completed and upcoming background tasks can be seen. This is where the sync interval for the automatically generated playlists is set. Any failures will be clearly indicated and log snippets can be inspected. Detailed information is obtained by clicking on a task. There is a ⋮ menu on the right which allows for:
- Viewing the task details
- Editing the task schedule. Frequency can be Hourly, Daily or Weekly. A precise time can be specified for the task for Daily and Weekly frequencies
- Running of the task now
- Disabling the schedule
Administrators can see all tasks on the server whereas Users can only see tasks created by them (e.g. playlist creation).
Genre Management
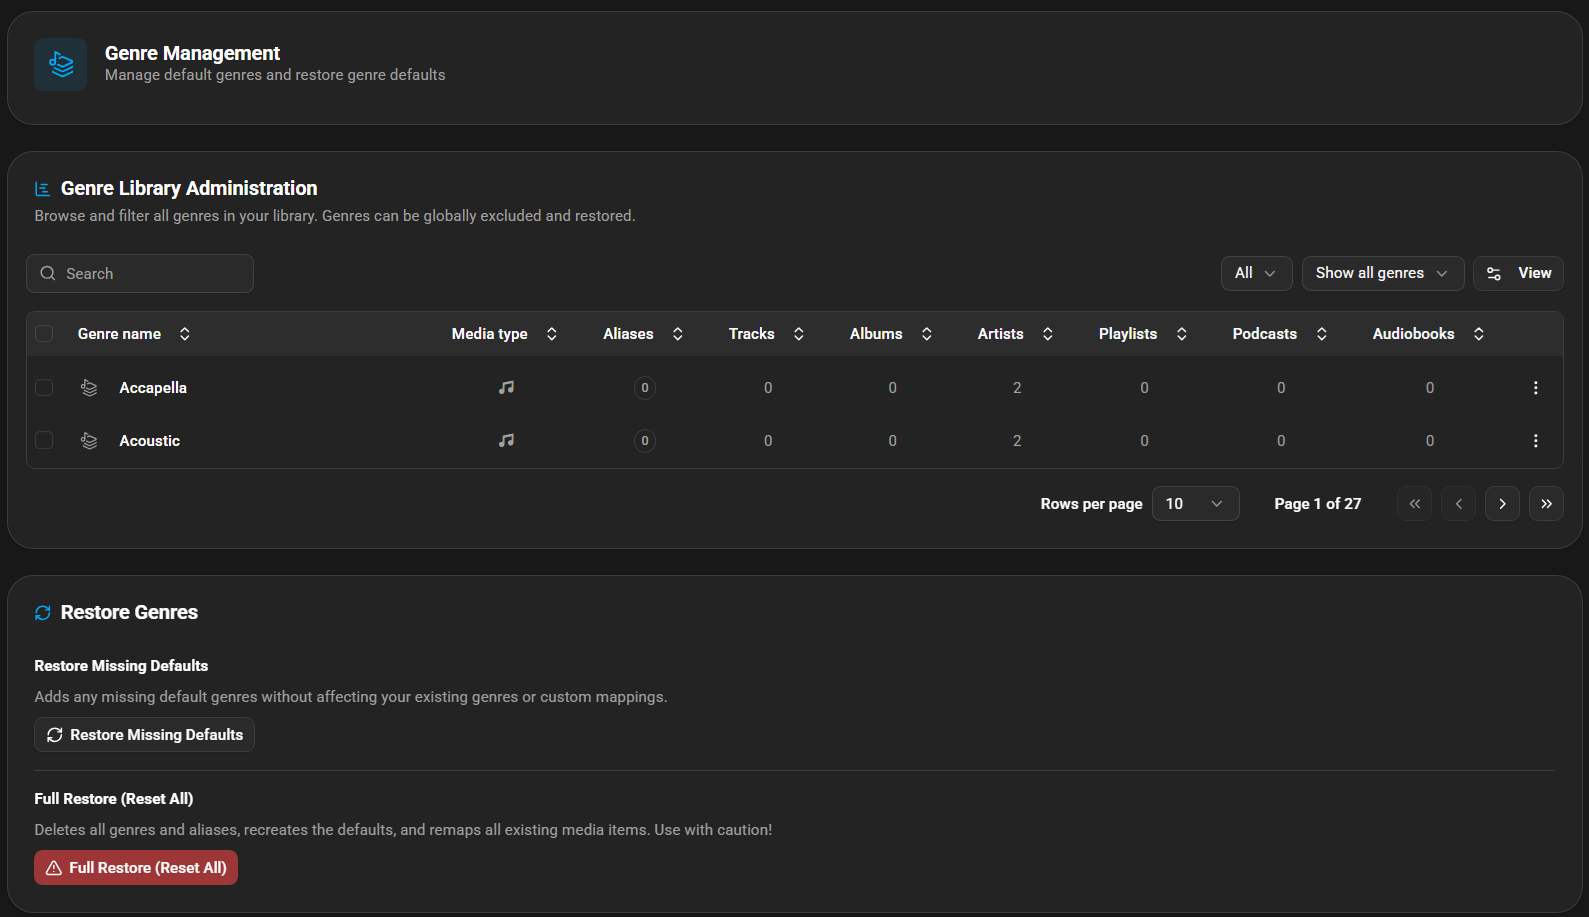
Section titled “Genre Management”Administrators can access the Genre Management page from the settings menu. This page provides tools for maintaining the genre database. The Genres page describes these tools and the rest of the genre system in full.
Genre Library Administration
Section titled “Genre Library Administration”Displays statistics about the genres in the library. Genres can be excluded from use via the ⋮ menu
Restore Missing Defaults
Section titled “Restore Missing Defaults”Checks for any built-in default genres that are missing from your library and restores them. This does not affect any existing genres or their mappings.
Full Restore
Section titled “Full Restore”A destructive operation that completely rebuilds the genre database from defaults. This removes all custom genres and restores the full set of built-in genres.
CAUTION
Full restore deletes all custom genres, aliases, and media mappings. This action requires a two-step confirmation to prevent accidental data loss.
Audio Analysis
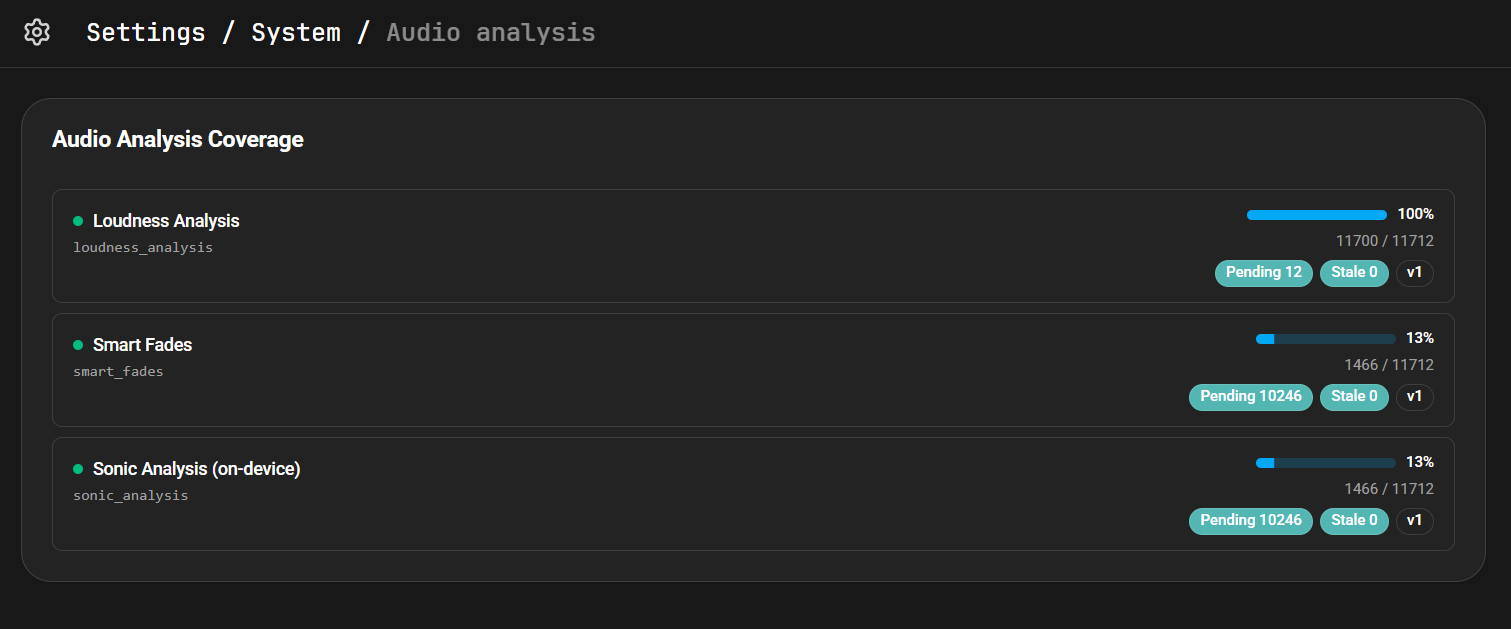
Section titled “Audio Analysis”Administrators can access the Audio Analysis page from the settings menu. This page allows examination of the progress of the installed audio analysis providers, namely Loudness Analysis, Smart Fades, Sonic Analysis and AcoustID Lookup. The stale number is the number of tracks that need to be re-analysed due to a version change. There is also a section which shows failures and the reason for the failure. Each line can be individually deleted to unblock the file and allow it to be rescanned.
This website uses privacy-first analytics to help us improve the site. You can view all data in our public dashboard.